
Move a site from Apache to CPanel Hosting, in this example with Register 365 but it is pretty much the same procedure for wherever.
I asked Register 365 if I had the steps right to do this, they replied yes, saying that I had the steps right. Initially it was going to be
- FTP back up files on old server
- FTP restore the site to the new server
- SQL Export the SQL DB
- SQL import into the new SQL DB (new to me having never manipulated SQL before)
- Point site to its new location.
It all sounded quite easy and I was confident I could move 30 plus sites. After which I was going to have the CPanel modern way of looking after my websites.
Unfortunately it did not go to plan, FTP was regularly getting locked by REG365 and the first attempt I had at importing my SQL table was a complete disaster. Lastly I was told I need to change my DNS settings. I think it took at least 48 hours of waiting for replies to my ticket within their support system before I managed to convince them that it was a contradiction to tell me to change the DNS and in fact I was right. What you need to do is modify the hosting settings within the DNS menu system, sounds the same but it most certainly is not.
After three days I had not managed to move one site, so, I started to use search engine answers to my questions, instead of waiting for bad replies on support tickets. Once I had sorted out my strategy I managed to move 30 sites in two 8 hour days, without using FTP (Hoorah as it was always blocking) and without having to do any more than creating an empty SQL table and its user, per site.
Here are the steps to move a wordpress site from one host to another
Step 1: Install the Plugin “Duplicator” on original site.
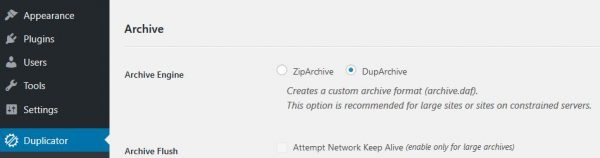
(In its settings choose Setting DupArchive)
Step 2: Run Duplicator (Watch their video)
once it is run, if you are able, add a word like “OLD” to the original site.
Step 3: Create your new space on new host. (Addon Domain in the Cpanel)
Step 4: Upload, to your new host the two files that the duplicator plugin created, using the CPanel Filemanager.
Step 5: Add a new DB + a user to your new host, join the user to the DB
watch the video from Duplicator website. Copy the db name and user and password into a text file.
Step 6: Edit your host file to add the domain temporarily
windows\system32\drivers\etc\host with the new IP Address, this enables you to test the site before switching over. You need to be Admin on your computer to do this, reset the file when you are finished.
185.2.5.95 yourdomain.com
185.2.5.95 www.yourdomain.com
Above numbers for Reg365 f course.
Step 7: Run Installer.php on the new host
Step 8: Answer the questions about your SQL DB, coming from the text file you made earlier.
Step 9: Change your DNS Settings to show new site (Finished)
Register365 say “change your DNS” what they should say is go to your control panel choose the domain DNS Settings and click Cpanel in the drop down box, wait a few seconds for the screen to refresh and save. (Don’t change any thing else)
Now you will be happy you added the word “OLD” to your old site, as the only easy way to know when the site has switched is to go into your browser and look, as long as the word OLD is still showing the old site is still in use. Of course you will need to ReLoad the site. Your site could switch in minutes, more likely over night, or unfortunately anything up to 48 hours.
There are nine steps, do them all in order, and it will work. If your site is over 500MB it is more difficult. But still possible adding the use of a File manager Plug-in and zipping your old site in segments. Then only using the Duplicator Plug-in to back up and restore the DB.